


If you’ve found this page you’re likely thinking “How the flock do I raise chickens?!” Well, we’re here to help! Chickens are wonderful creatures that can serve many purposes in your backyard farm.
From laying eggs, to keeping pests away, all the way to simply being lovable pets, raising chickens has become a very popular hobby in people’s backyards.
Following this guide should have you set up to purchase and raise some chickens of your own! Be sure to bookmark this page and come back to it whenever you want. There’s a lot of information here (and elsewhere on our site) that will help you as you grow your flock!
Quick Jump
Chapter 1: What are the Laws on Keeping Chickens?
Chapter 2: Chicken Care
Chapter 3: Where to Start? Hatching Eggs, Chickens, Pullets or Layers
Chapter 4: Chicken Breeds
Chapter 5: Where to Buy Chickens
Chapter 6: Chicken Coops
Chapter 7: Chicken Feed
Chapter 8: Chicken Feeder
Chapter 9: Chicken Waterers
Chapter 10: Chicken Predators
Chapter 11: Chicken Diseases
What are the Laws on Keeping Chickens?

The very first thing you’re going to want to do in the planning phase of buying and keeping backyard chickens is to check the laws surrounding fowl in your local area.
The ordinances are different everywhere, but each county government website will have a license and permits section that should include the rules and regulations you’ll need to follow.
Some counties will provide much more information and rules than others, but as a general rule, you’ll have to apply for a permit to keep chickens, and depending on how many you plan to keep will depend on the permit you apply for.
Rules and regulations in your country can range from being as simple as how many chickens you’re allowed to keep to how big your coop is allowed to be, so you’ll want to make sure you’re following your specific county rules.
If you’re having trouble finding the information you need, here's a handy search tool to help in finding Zoning information. USA GOV also has a handy tool to find contact information for your local government.
The Basics
Chicken care is not necessarily a full-time job, but you’ll want to stay on top of the daily, weekly and monthly tasks that come with it.
Chickens are much like any other pet. They can't live without you, so you need to make sure you have the time needed to care for them properly.
-
Water - Changing and cleaning your waterers daily is vital. Chickens need fresh water at all times. Making sure their water is not contaminated with dirt, poop or bedding material will serve them well and ensure their healthiness. Check out our Chicken Waterers Guide for more information!
-
Feed - Having the right feed and the right portions of it is also a daily chore. Our recommendation is to build your own DIY Feeder and let your chickens “free feed.” You can also feed them specific portions of feed per day, which will depend on how many hens you have as well as their size. Check out our DIY Chicken Feeder Guide to learn more about feeders!
-
Bedding - Unless you’re using the deep litter method, you’ll want to refresh the bedding at least once a week. If you’re unsure of what type of bedding to use, check out our Chicken Bedding Guide for more information!
-
Nesting Boxes - Your nesting boxes won’t require as much refreshing as your waterers, feeders or bedding, but you’ll need to keep an eye on them to ensure they don’t get filled with poop. Since you’ll be collecting eggs more than once a day, this will be an easy task. For more information on chicken nesting boxes, check out our Nesting Boxes Guide here!
-
Eggs - Collecting eggs can potentially be a twice or three-times-daily chore. Your chickens will all lay at different times and you’ll want to make sure the eggs are collected before something can happen to them. They can be kicked out of the nesting box, trampled on or even eaten by the chickens, especially if they’re new to laying. Check out our Ultimate Guide to Free Range Eggs to learn more about egg collection!
Cost of Raising Chickens
Raising chickens is certainly not going to be the cheapest thing you do in your backyard farm. From buying the chickens themselves to purchasing or building a coop and the feed, things can get pricey pretty quickly.
We’ve provided a few tools on our website to help you estimate how much things are going to cost.
In the articles listed above, there are some DIY plans to help you save money as you go. We’re pretty big on DIY at Mile Four so be sure to check those articles out and report back with your results and photos!
Once you’ve got your finances figured out, you’ll want to make sure you have enough space! Our Chicken Coop Size Calculator will help you with that! You’ll want to take into account the size of the coop as well as the run and how much space that will take up in your yard.
A lot of backyard farmers like to bring their chickens into the yard and even into the house in some cases, so don’t feel like you have to keep them in the coop or run at all times.
Where to Start? Hatching Eggs, Chickens, Pullets or Layers
Hatching Chicken Eggs
Many backyard farmers want to experience raising chickens from the very start. If you’re interested in watching a chick hatch and raising it from day one, then you’ll want to purchase some fertile eggs!
We would recommend doing as much research on our website as possible before you jump into raising chicks from hatch. This is because a lot of time and patience will go into it.
Presuming you do not already have a few hens, you’ll need to purchase an incubator for this method to work. If you do already have a few hens, you’ll need to ensure one of them is broody or the chickens will not get the necessary attention they need.
Cackle Hatchery is the best place to go for fertile hatching chicken eggs, and we recommend this incubator for a newbie!
Hatching chicken eggs can and will be a very rewarding experience for a newbie, but we recommend exercising caution with this method if you’re unsure.
For more information regarding hatching chicken eggs, broody hens and incubators, check out our Ultimate Guide to Breeding Chickens and our Broody Hen Guide.
Caring for Baby Chicks
An easier option for the new backyard farmer would be purchasing already hatched chicks and raising them.
Caring for baby chicks is considerably easier when you remove the hatching process since somebody has already taken care of that for you!
Hatching chicken eggs are usually sold by breed, but when you purchase baby chicks you can (in most cases) purchase a mixed flock. This is generally the preference of backyard farmers, especially on Instagram!
There are a few things you’ll need to do on a day to day basis to keep your chicks happy and healthy:
-
Time - You’ll need to be very flexible with your time during this period. Your chicks won’t be able to raise themselves, so be sure you or somebody else is going to be home as much as possible
-
Warmth - Until chicks are feathered, they’ll need to be kept in a warm, dry place. A brooding area with a heater will be necessary for this. You’ll want to make sure your brooding area is set up with a heater prior to their arrival
-
Cooling Area - In your brooding area, you’ll want to make sure there is a spot where the chicks can cool down. Having the heater in the middle or in one of the corners is your best bet. This way, they can head over to the cool side if they get too hot
-
Water - You can never let your chicks go without water. They’ll drink a lot during those first couple weeks, so ensure that clean water is always available in the brooding area. You’ll also want to make sure that the water they have access to is warm. If you’re using the right heater in your brooding area, this shouldn’t be a problem. If the water is too cool, their body temperature will drop and can cause death
-
Feed - Our Starter Feed will need to be in their brooding area at all times. Never let your chicks go without food! (READ: The 21 Week Feed Plan) Having a feeder that is low enough for the chicks to see the feed itself will allow them to eat whenever they want
-
Bedding - In the brooding area (as well as the coop once they’re old enough) bedding is vital for cleanliness. We recommend using hemp bedding for your brooding area as well as the coop once you transfer them. If you want to learn more about chicken bedding, check out our Chicken Bedding Guide!

Pullets
Pullets are likely to be the best option for a new backyard farmer.
Pullets are chickens that are fully grown but under one year old. Starter pullets are chickens that are under 22 weeks old.
Starter pullets are yet to start laying eggs, and you’ll get them when their body is still developing, but you won’t need to worry about brooding areas, heating and water temperature.
The reason we think they’re the best for the backyard farmer is that you can get used to the ins and outs of keeping chickens while you prepare yourself for egg-laying and collection.
If you’re purchasing chickens for their eggs, purchasing a starter pullet might not be the best option for you, but if you’re willing to wait a little bit then pullets can be a fun place to start!
Layer Chickens
Layer chickens (also known as a “Point of Lay Chicken”) are chickens that are at least 20 weeks old and should soon start laying eggs.
Of course, there’s no real way of knowing exactly when your chicken will start to lay eggs, and 20 weeks is a close estimate that takes into account all breeds and their specific laying attributes.
It can be a little confusing at first to figure out whether you have a pullet chicken or a layer chicken, but sometimes you have both! A pullet is simply a chicken that is less than a year old. Layer chickens will start to lay somewhere around the 20-week mark, so for 6 months or so you may have a pullet and a layer chicken.
Starter pullets are those that are less than 22 weeks, so be sure to buy the one that fits your farm best when you make that first purchase.
Unsure if you have a pullet or a fully grown hen? Here are a few things to check:
-
Feathers - The feathers of the pullet will be very clean and glossy looking
-
Eggs - Simply put, if you are suspicious that you have a pullet rather than a hen, check egg production. Pullet eggs will be smaller than a hen’s eggs, and if you have a starter pullet you won’t be getting eggs at all
-
Comb - The comb on a hen is at the top of their head. It does many things ranging from heat control up to sexual attraction! The comb of a pullet will be much smaller than the comb of a fully grown hen. Below we’ve provided a side-by-side look at a pullet comb vs a hen comb

As you can see, the chicken on the left is fully grown along with its comb. The pullet on the right has a much smaller comb as well as feathers that are glossy and very clean.
Chicken Breeds
Egg Layers
As chicken raising has become more popular over the past decade, egg-laying chickens are a favorite for backyard farmers and the main reason most people want to raise chickens in the first place.
If you’re planning on using your farm predominantly for egg-production (whether that means to keep for yourself and your family or to sell them) you’ll want to research chicken breeds for eggs to make sure you’re getting the most out of your little ladies.
Below we have provided a fancy guide to the 10 best egg-laying chickens.

What Breed Fits Your Needs? | TAKE THE 5 MINUTE TEST
There are many other chicken breeds that will produce plenty of eggs, but these 10 will consistently pop out a great number for your Sunday morning omelets (assuming they are getting your utmost tender, loving care).
Rare Chicken Breeds
Rare chicken breeds can be super fun to raise. They’ll add an air of mystique to your flock and some vibrant colors in some cases too!
Rare breeds, by definition, aren’t the easiest or cheapest birds to find, but many hatcheries will have them in stock at several points throughout the year.
Some rare breeds include Ayam Cemani’s, Swedish Flower Hens and Black Copper Marans. The latter is a beautiful bird that will make all of your neighbors and Instagram followers jealous that you were able to snag such a rare bird.

Ayam Cemani’s are a personal favorite of all of us at Mile Four too! We have one in our flock that you’ll see pop up on our Instagram from time to time!

Broody Hens
In your research, you’ve likely come across the term “broody” several times. A broody hen is one that has decided she is going to sit on her eggs in the hope that they will hatch.
Without a rooster in your flock, these eggs will never hatch, so a lot of backyard farmers like to discourage broodiness.
If, however, you’re hoping to hatch some chicks of your own, there are certain breeds that are more likely to become broody than others!
Below we’ve provided a handy graphic that shows these breeds so you can make an educated decision.

What Breed is Best for Your Flock? | BREED SELECTOR GUIDE
The Silkie (bottom middle) is probably the best of all the broody hens. They make excellent mothers too, so if you’re planning on hatching chicks at some point, a Silkie will be the breed for you.
Where to Buy Chickens
Chicken Hatchery
Buying Chickens from Hatcheries
One of the easiest & most common ways to buy chickens is through an established chicken hatchery. While many states have at least one hatchery, most reputable hatcheries sell chicks, pullets, & point-of-lay hens online & ship nationwide.
Well-known U.S. hatcheries typically offer a wide range of breeds and purchasing options, including fertilized eggs, day-old chicks, started pullets, & laying-age hens. Some of the most trusted hatcheries include:
- Cackle Hatchery (Lebanon, Missouri)
- Meyer Hatchery (Polk, Ohio)
- Murray McMurray Hatchery (Iowa)
- Hoover’s Hatchery (Iowa)
- The Chicken Coop Company (nationwide fulfillment)
Many of these hatcheries also sell ducks, turkeys, & other poultry, along with basic coop supplies & accessories for those starting from scratch.
The largest & most popular hatchery is Cackle Hatchery based out of Lebanon, Missouri. Alongside the many different varieties of chickens to purchase, you can also find ducks, turkey, & even supplies for your coop should you be starting from scratch.
It’s important to note that not all hatcheries carry every breed, & availability can change quickly during peak chick season. Breed selection, shipping dates, & minimum order requirements often vary, so planning ahead is key.
Minimum Orders, Shipping, and What to Expect
Most hatcheries require a minimum chick order, largely due to the cost & logistics of live-animal shipping. Ordering a slightly larger number of chicks is also common practice, as there is always a small risk of loss during shipping or early brooding.
In most cases, chicks arrive healthy, active, and ready for warmth & water. Still, preparing for less-than-ideal conditions, & knowing how to respond, can make a big difference, especially for first-time or expanding flock owners.
It’s also possible to receive unwanted roosters, even when ordering sexed chicks. Planning flock size with this in mind can help avoid issues later on.
If you live close to a hatchery, some allow local pickup, which can reduce shipping stress & costs. Policies vary, so it’s best to contact the hatchery directly to ask about in-person purchasing & breed selection.
Buying from Local Backyard Breeders
In addition to large hatcheries, local backyard breeders can be another option worth considering.
Buying locally can help avoid shipping altogether and may offer birds that are already adapted to your climate. Some backyard breeders also focus on specific or heritage breeds that may be harder to find through large hatcheries.
That said, availability, health practices, & breed consistency can vary widely. When buying from a backyard breeder, it’s important to ask questions, observe living conditions, & understand whether birds have been vaccinated or sexed.
For many chicken keepers, comparing both hatcheries & local breeders helps narrow down the best option based on timing, breed goals, & experience level.
Check out our Breed Selector Guide to see what breed fits you.
Chicken Coops
Chicken Coop Plans
Before your chickens arrive, you’ll want to make sure you have housing set up and ready for them to move into.
Many backyard farmers completely free-range their chickens but with the ever-growing problem of predators we recommend against this.
Chicken coops are where you can get really creative with reclaimed materials. We even saw somebody once use a swing set (without the swings of course) for the frame of their coop.
The first thing to consider is the coop size.
Chickens do not like being crammed in a coop. They will get angry and could attack each other.
However, when flocks have too much space inside, it can be hard for them to stay warm on cold nights.
Check out our Chicken Coop Size Calculator to find out exactly how much space you’re going to need.
If you’re building your first coop, check out our Chicken Coop Ultimate Guide for all the chicken coop plans you could possibly need! We’ve put a handy widget on there so you can filter by budget, size, and difficulty too!
DIY Chicken Coop
The coops listed in our Ultimate Guide range from easy to hard and are all DIY based, but if you’d like to really challenge yourself, we’d recommend following the videos of April Wilkerson.
April has a YouTube channel with more than one million subscribers! She’s kind of a badass in the DIY world and her three-part video on how to build a chicken coop is absolutely required viewing if you’d really like to get your hands dirty and build your own.
The plan for the coop itself is available here and she also has other plans for smaller designs if your yard simply won’t accommodate the 8x20 design.
If this DIY Chicken Coop plan seems a bit overwhelming, check out the much smaller and easier to make coop video that April did below!
Chicken Coop Kits
Not convinced by DIY? We get it. Sometimes you just want a kit that you can put up in an hour and be good to go.
DIY isn’t for everyone, but you will have to take into account the required maintenance that a coop needs from time to time.
Whether it’s a coop you’ve built yourself or a kit you bought online, you’ll have to treat the wood, change out locks and do other metalwork to ensure your chickens have a nice home.
Some chicken coop kits are not always as predator-proof as a homemade one. Because of this, you’ll want to ensure you deter predators when you can.
One of the best ways to do this is to dig a small trench matching the dimensions of the coop so that the coop can sit in the ground.
Filling the trench with dirt and making sure the coop is then structurally sound and unable to be lifted up from the ground will stop many predators like foxes and raccoons from getting in.
Cleaning Chicken Coops
You’ll want to make sure your coop is cleaned out at least once a year. The best time to do it is early Spring when the weather finally starts to warm up.
Cleaning it too often is counterproductive because you will need to remove the bedding every time as well as disturb your chickens which they’ll probably get annoyed with you about.
Routine cleaning on a smaller scale will including changing out the bedding, the flooring in the nesting boxes and making sure the poop is out too, but if you’re planning on a deep clean, here’s what you’ll need to do:
-
Remove the bedding - Using a square shovel, get rid of the bedding along with all of the manure and feathers that have fallen into it
-
Wash - Using a hose or a bucket, wash out the floor and the walls to make sure you’ve cleaned everything out. You can use a 1:1 ratio of white vinegar and water for this
-
Scrub/Sweep - With a thick bristle brush, sweep out the remaining bedding and dirt that remains on the floor
-
Let dry - Allow the damp coop to dry while your chickens are out of it in the run. Ventilation is key here
-
Add bedding - Re-lay the bedding in your coop. For more information on bedding, check out our Chicken Bedding Guide!
Regular cleaning will be less rigorous than this, even more so if you use the Deep Litter Method like we recommend.
The deep litter method is a favorite of many backyard farmers. It allows you to maintain the coop and run in other ways without worrying about changing the bedding and scooping up manure all the time.
With this method, you can use any of the above bedding materials (as well as grass clippings), but for this article, we’ll be focusing on wood shavings since they’re the best option. We say wood shavings instead of pine specifically because a lot of people have been known to use cedar.
You’re going to bed your coop the same way you always would the first time, throwing shavings down so there’s about a 3 inch high layer across the entire coop.
Once or twice a week you’ll want to top off the layer with more bedding material. Use your discretion on how often you do this. Depending on how many chickens you have you may need to do this more often, especially if the coop looks to be getting very messy.
When you top up the layer of the bedding, throw some treats down so the chickens kick up and stir the bedding, meaning you don’t have to.
The stirring up of the bedding will speed the decomposition process up, but if you don’t want to feed your chickens too many snacks, you can stir the bedding up gently with a garden fork.
Even if you are feeding your chickens snacks to aid with this method, you’ll still probably want to stir things up with a garden fork because poop can clump together and get pretty messy.
Ventilation is key to this method. There is a chance that an ammonia smell will come with this method if your ventilation is bad, so make sure (even in the colder months) that you’re ensuring proper ventilation.
The best time to start the deep litter method is close to the beginning of winter. Once you’re deep into spring it’ll be time to change the top of the bedding.
Leaving a 1-2 inch bottom layer when you clean will allow any new bedding to absorb any good bacteria that has gathered over the past few months.
Chicken Coop with Run
Many people like to allow their chickens to be completely free-range, roaming around the backyard as they please only to enter the coop at night and to eat and drink.
Most, however, prefer to attach a run to their coop to keep predators at bay and ensure their chickens stick to one specific spot in their yard.
The best way to do this is to build your run as soon as your coop is built, and attach it directly to one of the entrances/exits of the coop.
Here are some things you’ll need to consider when building a run:
-
Roofing and fencing - Some runs you’ll see online-only utilize fencing and leave out a roof, but we highly recommend adding a roof to your run to minimize the options predators have
-
Size - Chickens will need more space than inside their coop. Use about 10 square feet per bird for your run
-
Material - Chicken wire can be flimsy and easily broken or crawled through by predators. We recommend using this Galvanized Cloth for the fencing and roofing
Free Range Chickens
We’d hazard a guess that 99.99% of backyard chicken owners completely free-range their chickens. Free-range simply refers to chickens who have access to the outdoors, as opposed to being quite literally cooped up all day.
If you’re part of the 0.01%, figure your stuff out, dude.
Many larger farms use the term “cage-free” when referring to their hens, but many of these chickens have never seen the light of day and are only there to lay eggs.
Free ranging chickens really requires just the regular amount of time and effort you’d already be putting into raising those fluffy ladies, but if you’re worried that they’re not getting enough time outdoors, you may want to invest in an automatic chicken door.
Most models open at dawn and close at dusk, so you won’t have to worry if you’re not around to do it for them.
It could even double as a nice alarm clock for when those early risers start bawk bawk-ing right outside your back door!
Teaching your chickens to go back into the coop at dusk will be on your to-do list with this method, and we’ll get into that a little later when we talk about treats.
Chicken Feed
What Do Chickens Eat?
Chickens are omnivores which means they’ll eat pretty much anything you lay in front of them.
With that being said, your backyard chickens will need a little bit of supervision to make sure they’re getting a balanced and nutritious diet at the right points in their lives.
Whether you have chicks, pullets or laying hens, Mile Four has got you covered.

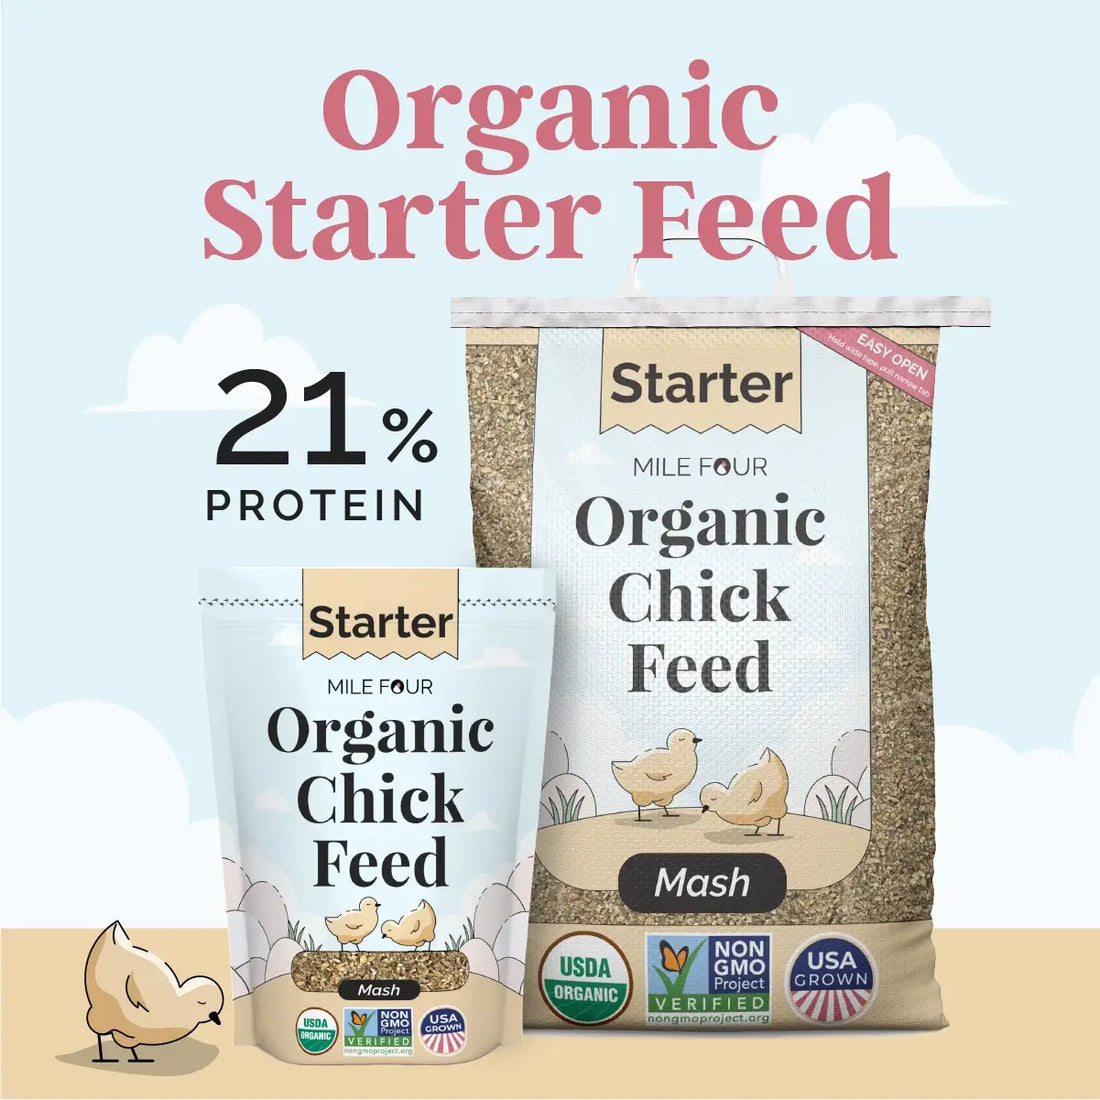
Chick Starter Feed
From the day a chick hatches until about eight weeks of age, it should be fed a chick starter feed formulated specifically for early growth & development.
Starter feed supports:
- Rapid skeletal & muscle development
- Feather growth
- Immune system development
Chicks should have constant access to starter feed & clean, fresh water.
Protein Content in Starter Feed
Most chick starter feeds contain 18–22% protein, with 20–21% protein being very common. This higher protein level supports the fast growth rate chicks experience during their first weeks of life.
Because chicks grow so quickly, their nutritional needs are more precise than those of older birds, making a balanced starter ration essential.

When to Switch From Starter Feed
Chicks should transition from starter feed to grower feed at around eight weeks of age.
READ: The 21 Week Feed Plan | When to Switch Feed
Starter feed is not designed for long-term feeding. Continuing it beyond the starter phase provides more protein than growing birds require and can place unnecessary metabolic demand on their systems. For this reason, a timely transition to grower feed is recommended.
To avoid digestive upset, transition gradually over 5–7 days by mixing starter & grower feed.
How Much Starter Feed Chicks Eat
On average, you can expect chicks to consume:
-
~1 to 1.5 lbs. of starter feed per chick, per week

Consumption will be lighter in the first few weeks and steadily increase as chicks approach eight weeks of age.

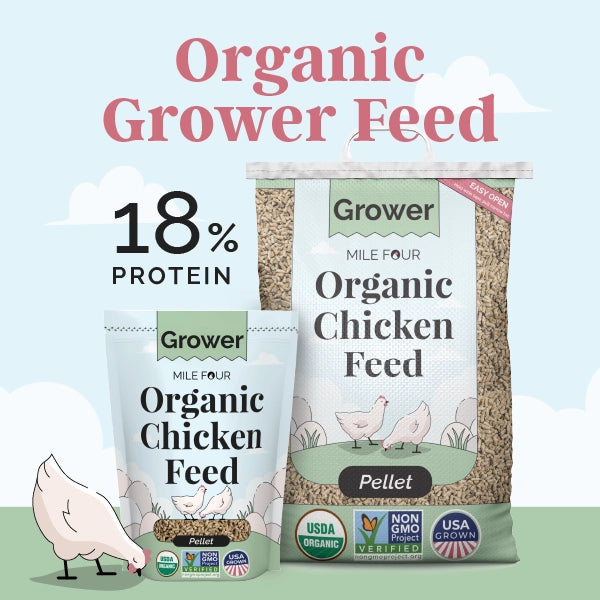
Grower Feed for Chickens
From eight weeks on, you’ve got yourself a pullet! Pullets are hens that are less than one year old, but there is a distinction once they start laying eggs. Then they become a point-of-lay hen.
While they’re still officially pullets, however, you’ll want to feed them an 18% protein grower feed.
During this period between eight weeks and their first egg (usually around 20-24 weeks old) you pullet will do most of its growing. You may not notice it fully, but your hen will be fully grown when it starts to lay eggs.
Its feathers will be shiny and clean, and its comb will be much smaller than an older hen, but for all intents and purposes, your hen will stay the size she’s at.

A chicken eating grower feed is likely to eat about 1 ½ lb a week, so depending on the size of your flock you’ll want to plan accordingly.

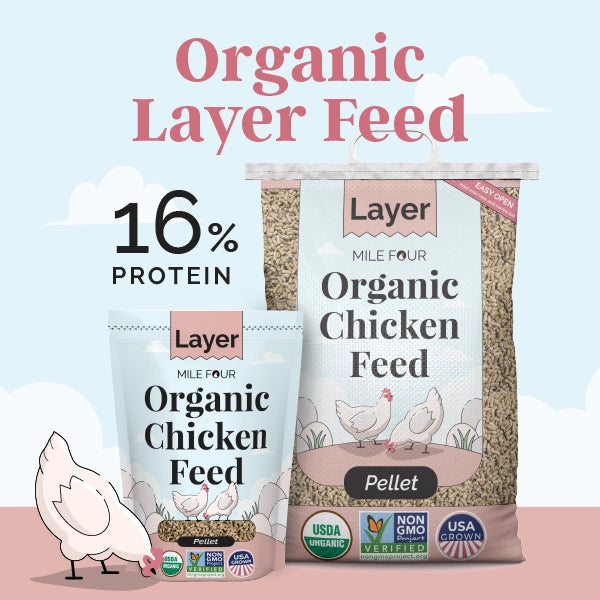
Chicken Layer Feed
As soon as your hen starts laying eggs (around 20-24 weeks), you’ll want to switch them to a layer feed.
The best variation of layer feed is 16% protein, but it also comes in an 18% variation that can be used in the winter to keep your chickens warm.
You will not need to change your feed again, as chickens will continue to eat this layer feed from 20 weeks all the way into adulthood and old age.
Your layer chickens will eat up to 1 ¾ lb of feed a week, so plan accordingly when purchasing.

READ: Calculate Chicken Feed Cost with Calculator
Layer feed has a higher calcium content than starter and grower feed because calcium is needed in egg production.
A chickens’ calcium will be depleted if they do not have extra calcium and will lead to soft eggs that you won’t be able to eat or sell.
Luckily, if you start to notice soft eggshells, there are ways to combat this!
Note: These charts show typical feeding ranges, while the amounts below reflect average intake. Individual chickens may eat more or less depending on breed, weather, and activity
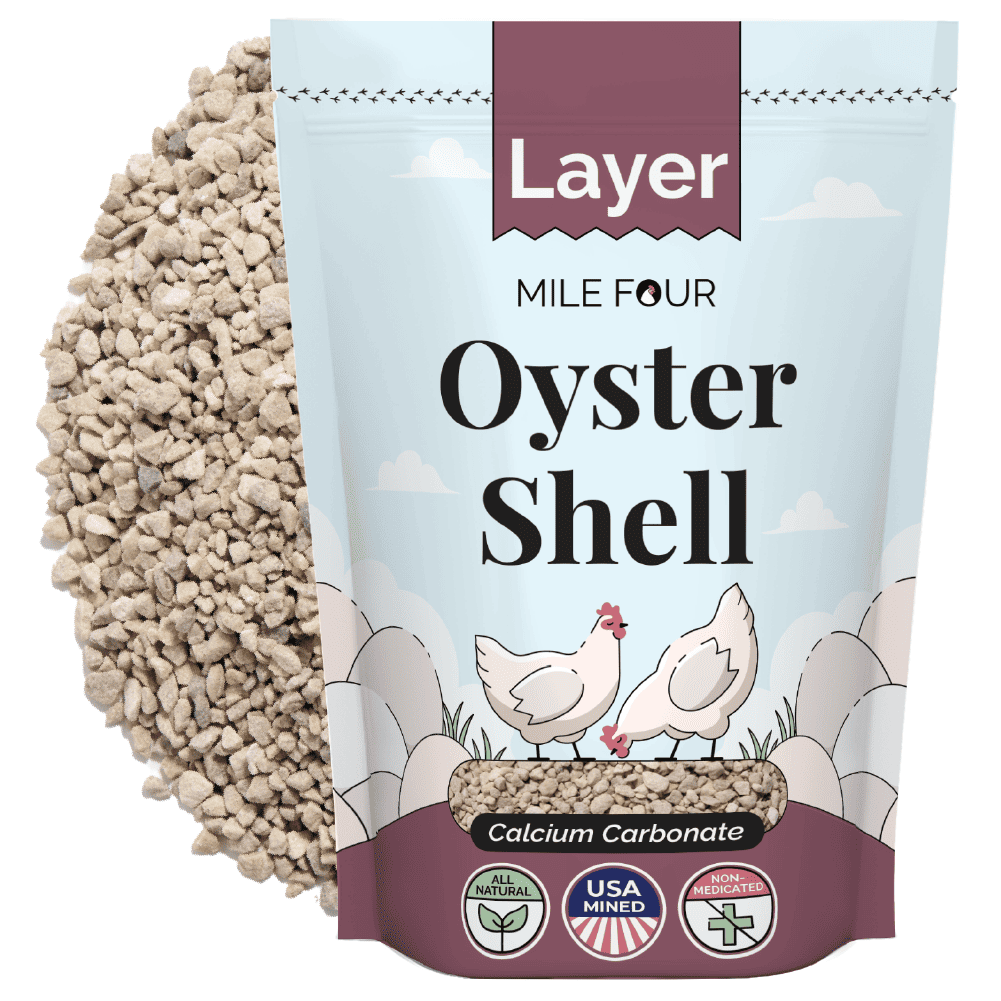
Oyster Shell
Oyster Shell is a supplement for laying hens to aid in their egg production.
Crushed oyster shell is full of calcium and is probably the best way to provide the extra that they need when they start to lay eggs.
Oyster shell should be made available to laying hens in a separate feeder. Hens that need it will find it and instinctively eat enough to ensure their calcium levels are at a good level.
If you have a mixed flock of starters, growers, and layers you don’t need to worry! Since non-layers don’t need the added calcium, they’ll leave it alone.
Offering oyster shell in a separate container to their food will be sufficient, and should be topped up relatively regularly to ensure your ladies meet their nutritional needs.
Chicken Scratch
Chicken scratch is more of a treat than a supplement, but many backyard farmers have it on hand especially in the colder months or as a training method.
Chicken scratch is made from five whole grains. Oats, Wheat, Corn, Barley, & Buckwheat.
Scratch should only be used as a very small part of their total diet as it doesn’t have all of the necessary nutrients found in a complete feed.
Two teaspoons of scratch per chicken, per day, is the best way to ration out the treat, and you should scatter it onto the ground or in their feed if you’re using the free-feeding method.
A great way to use scratch is to get your ladies into their coop at night. Scattering some scratch onto the floor of the coop when you want them to enter is the best way to train them that it’s night time.
After a few days, your chickens will know that it’s time to enter the coop, so you can either stop scattering the scratch treat or continue to do so to get some brownie points from them!
Chicken Grit
Chicken grit is a supplement that helps chickens with their digestion. Since chickens don’t have teeth, grit develops a healthy gizzard and allows food to be ground down before it digests in their stomach.
Like oyster shell, chickens will instinctively eat grit when they need it, so it should be offered in a separate container to their feed.
Grit generally comes in two different variations. One for starters and one for growers & layers. The main difference is the size of the grit.
It is recommended to let starter chicks get used to their starter feed with plenty of water before introducing grit to their diet. They’ll need the necessary nutrients early on before supplements start being introduced.
Chicken Feeders
There are many different chicken feeders available online, and it can become a bit tiresome to select the “right,” one. With most backyard chicken products, everybody has an opinion and theirs is always right!
DIY Chicken Feeder
We, of course, have our own opinion too and needless to say, it’s the right one ;)
The best chicken feeder for your coop will be our PVC Chicken Feeder than you can build at home for less than $25!
You’ll find all of the plans and the links to the parts you need on our DIY Chicken Feeder Guide. We’ve also placed the plans below!

Automatic Chicken Feeder
If you simply don’t have the time to build your own chicken feeder or want something ready to go right out of the box, an automatic chicken feeder might be the way to go.
Automatic chicken feeders also help if/ when you’re not around your backyard farm throughout the day. This is because you can ensure that pests won’t have access to the feed when you can’t physically stop them.
Our favorite automatic chicken feeder is this one from Grandpa’s Feeders. That’s because you can fit a full bag of Mile Four feed inside it, as well as the fact that it is pest-proof.
Chickens only need to step on the plate and the feeder opens up for them to eat. Once they hop off, it closes and nobody else can get in!
Hanging Chicken Feeder
Another option for your flock would be a hanging chicken feeder. These feeders are particularly good for ensuring your chickens don’t develop any back problems as you can raise and lower them to fit your flock’s needs.
Changing the height of the feeder as they age will prevent any issues with their backs, and these feeders are also incredibly easy to install and remove.
Many feeders will keep a full bag of Mile Four’s feed inside them, and if you’re planning on utilizing hanging feeders we recommend using this Harris Farms feeder.
If you’re worried about pests becoming an issue with this type of feeder (or any other feeder for that matter), skip forward in this guide to the “Chicken Predators” section!
Chicken Waterers
Water intake is vitally important for your chickens from day one of their life all the way into adulthood.
Water makes up about 60% of their bodies (about the same as humans), so they’ll always need access to fresh, clean water.
A chicken will drink around a pint of water a day, but it can change depending on a few different factors:
-
Seasons - your ladies will drink twice as much in the hotter months
-
Age - as chickens age, they drink more
-
Laying - If they’re laying, they’ll drink about twice as much as non-layers
-
Time of day - they’ll drink the most as soon as they wake up
DIY Chicken Waterer
Just like in our chicken feeder chapter, we’ve got a guide to building your own waterer too! You can find the plans below, and check out our Chicken Waterer Guide to see the products you need and a more in-depth run-through of the process!

Pretty easy, right??
If you do have any issues with it, feel free to reach out at milefour@milefour.com and we can walk you through it!
Automatic Chicken Waterers
Although DIY Chicken Waterers are easy to make and you can use parts that are likely lying around the house, we recommend purchasing an automatic chicken waterer for your ladies.
The reason behind this is that automatic waterers drastically lower the chances that water will get contaminated with chicken poop, food and other things lurking in your yard.
Fresh water at all times will keep your chickens healthy for much longer!
These types of waterers aren’t contamination-proof, and you’ll need to clean out the bucket regularly. A good rule of thumb is to clean it every time you refill it.
Chicken Water Nipples
Automatic chicken waterers utilize “nipples” to release the water to the chickens. A chicken will peck at the waterer and the waterer then automatically releases water.
These nipples screw into buckets if you’re using a DIY method, or you can buy waterers with nipples already fixed to the device.
Many of these waterers also have cups attached underneath the nipples to catch water as it is released.
As chickens learn how the waterer works, waste will soon become much less of an issue, and it should also keep the water off the ground that can cause muddy backyards and potential contamination of the water.
Heated Chicken Waterer
An issue for colder climates is keeping water from freezing. As mentioned previously, chickens need constant access to water, so you may want to invest in a heated chicken waterer so you never run into issues.
Heated chicken waterers generally plug into the power supply, so make sure you have one outdoors!
These waterers will only turn on when necessary, so during the summer, you can still use the waterer without it heating its contents and producing boiling water.
There are a few different models on the market, but we recommend this one from Farm Innovators!
For more information regarding chicken waterers (including the cleaning process) check out our Chicken Waterer Guide here!
Chicken Predators
A lot of the emails we receive are questions about how to keep predators at bay.
Unfortunately, it’s likely to be an issue for you throughout the entire time you keep backyard chickens, but there are ways to limit the amount of exposure predators have to your chickens, and pests have to their feed.
Predator Proof a Chicken Coop
The first step you’ll want to take is predator-proofing your chicken coop. Below we’ve provided a graphic for you to do just that!


Taking these actions will prevent a number of nasty predators from coming to take your chickens and their eggs. Some of them even spread disease, so this should be one of your top priorities when you’re putting your coop together.
Dogs and Chickens
Many backyard farmers love other furry friends too but can be apprehensive when introducing their dogs to their chickens.
Of course, some breeds were (and in some cases still are) bred for hunting, so if you’re planning on having chickens in your backyard, you’ll want to keep Greyhounds, Terriers, and Huskies away.
There are exceptions to the rule and it all depends on the dog’s temperament and prey drive. Below we’ve provided a graphic on how to introduce your dogs to your flock.

The best advice we can give is to practice caution. If you don’t believe your dog(s) will live in harmony with your chickens, it’s probably best not to introduce them.
If you think you’ve got the calmest dog in the world, still practice with the above method. If your dogs and flock live peacefully together, we’d love to see photos!
Chicken Diseases
Marek’s Disease in Chickens
Marek’s Disease is probably the biggest thing you want to avoid in your backyard farm. It is a virus that, depending on the strain, can attack the central nervous system of a chicken, cause tumors in major organs, and blindness.
The lowered immune system due to Marek’s Disease will also mean chickens are more susceptible to other illnesses during the time they have it.
Transmission of Marek’s Disease is due to a couple of different factors:
-
Dirty bedding
-
Droppings
-
Old feed
-
Dander - The dead skin of a chicken
When mixed together, these can create something called “poultry dust” which is inhaled by the chicken, causing Marek’s Disease.
Some of the symptoms of Marek’s are:
-
Visible weight loss
-
Grey or miscolored iris
-
Bumpy skin (look under the feathers for this)
-
Leg paralysis, as well as in the neck and wings
If you notice one or more of these symptoms, you’ll need to isolate the potentially sick bird immediately. Marek’s can and will spread to the entire flock if you’re not careful, so bring your little lady inside if you can.

Marek’s Disease Vaccine
There is no cure for Marek’s, but there is a vaccine that can be administered to chicks when they are one day old.
No matter whether you’re buying chicks, pullets or point-of-lay hens, find out whether they’ve been vaccinated before you buy.
The vaccine is very effective and is currently the only way aid in prevention.
Fowl Pox
Fowl pox is a viral infection caused by fighting between chickens. It can also be caused by insects biting a chicken’s skin.
The opening of a cut will get infected and can cause raised scabs on the skin as well as on the mouth (and in some cases the throat) of the chicken.
There is a vaccine for Fowl pox which needs to be administered every few years, but no cure other than time. Separating your chicken from the flock so their cuts can heal is the best way to treat this infection.
For information on more health issues that can be a problem for chickens, check out our Ultimate Guide to Breeding Chickens. We have a chapter dedicated to health issues there!

And we come to the end. Breath in. Breath out. Namaste.
We will regularly add to this guide as new information comes to our attention, so if you have anything you didn’t see here that you think we should have covered please comment below or reach out through Facebook or Instagram!
----
Sources:
Penn State Extension (2023)
“Layers produce ~250–300 eggs/year under good management.”
https://extension.psu.edu/backyard-chicken-production
University of Minnesota Extension (2022)
Breed selection & production expectations
https://extension.umn.edu/small-scale-poultry
University of Kentucky Extension (2021)
Egg production ranges by breed type
https://afs.ca.uky.edu/poultry


2 comments
Thank you for this information. Our first 6 chickens are arriving in April. I’m trying to get everything ready.
Thank you. loved your article. It was really helpful for my business.